
Blair Academy Photography
By Samantha Kowalick ‘25

Step 1:
Select an image that you want to edit using masks.

Step 2:
Make an edit plan for what you know you want to change about the photo. Making an editing plan at the start helps you keep on track and be super detailed with your edits

Step 3:
This part is optional, but you can start by fixing the lighting of the image if necessary (if the overall lighting of the photo is too bright or too dark just neutralize it).

Step 4:
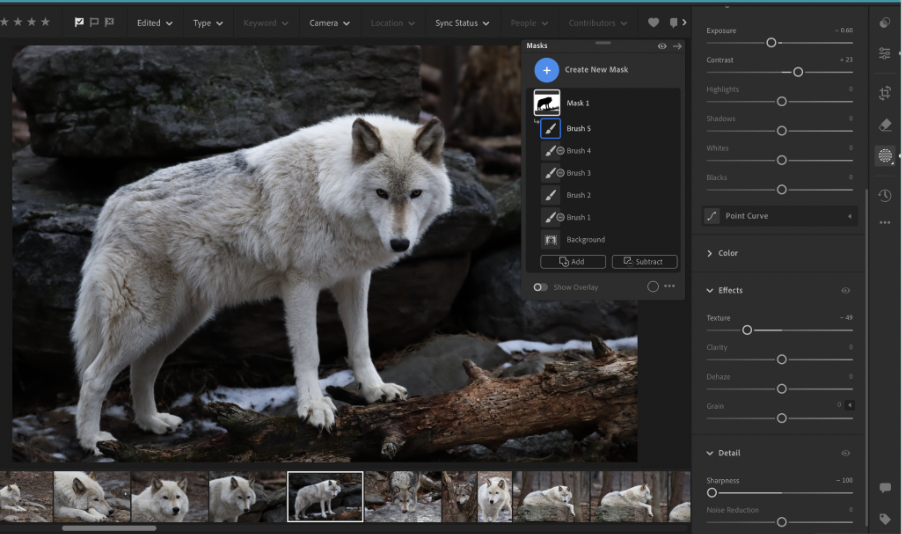
Click “Create New Mask” and then select “Background” to mask only the background. Use the “Add” and “Subtract” tools (highlighted in image to the right) to touch up the mask making sure only the background is selected. Take your time with this and zoom in to get a more precise mask (the more detailed you are the better the photo will look in the end!!).
Step 5:
Making the background slightly darker than the subject allows the wolf (or whatever subject is in the photo) to pop off of the background. Use the “Exposure” bar to darken the background slightly. Use the “Texture” and “Sharpness” bars to add a blurring effect to the background by lowering them. Make sure you don’t darken the background too much because it will add a harsh line around the subject; darken the background just enough to draw the eye to the subject.

Step 6:
Add another new mask, but this time select “Subject.” Again, use the “Add” and “Subtract” tools to perfect the mask (take your time).

Step 7:
Use the “Highlights” bar to brighten the subject slightly. Then utilize the “Contrast” and “Clarity” bars to sharpen the subject (this step will make the subject pop even more against the blurred background). If the shadows are not prominent enough you can use the “Shadows” bar to darken the shadows of the subject some more.


Step 8: After you are happy with the way the subject looks against the background, you can experiment with enhancing the unique features of the subject. For this image, as seen in the edit plan, I wanted to focus on enhancing the eyes, ears, nose, and stripes of color in the wolf’s fur. To get the most detailed masks use the brush tool (create a new mask and select “Brush”). You can change the size of the brush to be as detailed as you want, zooming in usually helps to get the most detailed masks. Check images above to see specific edits and changes that I made for each feature.

Step 9:
After your done experimenting with more detailed masking and you are happy with the way they look, you can go back to the overall image editing tools. Look at the image with all of the masks applied and add finishing touches to the final product. For example, I decreased the “Vintage” bar to add an extra spotlight type effect on the subject, and I adjusted the basic lighting bars from the first step. You can always go back and edit specific masks if you don’t like them. After you are happy with the image, you are officially done!
Final Images:


